
I’ve seen so many wonderful miniature doll cakes on the internet, especially the ones made from polymer clay. They look amazing, but what if you don’t have polymer clay or the skills to work with it?
That’s exactly the situation I was in. I wanted a cute miniature cake for my dolls, but I also wanted to use simple, affordable materials that are easy to find. So I came up with a way to make a miniature doll cake 1:6 scale using EVA foam, some leftover light filler paste, and a handmade piping tool.
In this tutorial, I’ll show you how to make and decorate a miniature doll cake step by step, so you can create your own tiny dessert from simple materials.
Materials You’ll Need
Cake Base:
- EVA foam sheets (white and pink)
- All-purpose UHU adhesive glue
Frosting and decorations:
- Light weight filler paste (the type used for home repairs)
- Popsicle stick or a piece of cardboard for spreading the frosting
- Handmade frosting tool. Learn how to make it on Step 3 below.
- Tiny cherries and blackberries made from hot glue. Check Step 5 to learn how to make them from scratch.
Step 1: Cut and Assemble the Miniature Cake Layers
You’ll start by creating the cake base from EVA foam. This gives the cake its structure and a realistic layered look when viewed from the side.
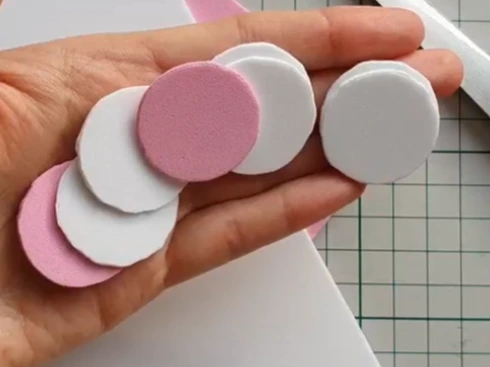
Cut the EVA Foam Circles:
- Cut 8 circles, each 3.5 cm in diameter.
- Use white EVA foam for 6 of the circles.
- Use pink EVA foam for 2 of the circles.
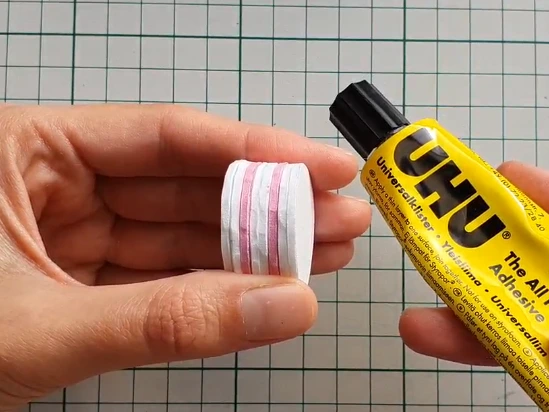
Assemble the Miniature Doll Cake Stack:
Glue the circles together in the following order from bottom to top: 2 whites, 1 pink, 2 whites, 1 pink and two whites.
Press the stack gently so the layers adhere well, and let the glue dry for a few minutes. You now have the basic cake shape with pretty pink layers that will show through under the frosting.
Tip: When the glue is completely dry, you can sand the sides with sand paper to create realistic texture.
Step 2: Add the Base Frosting Layer
Now it’s time to add the first layer of “frosting,” using wall filler paste. This step is similar to crumb-coating a real cake.
With a popsicle stick, apply a thin layer of wall filler to the top of the cake and to the sides. Make sure you leave the pink layers visible on the sides. You want that layered effect to still show through once the cake is decorated.
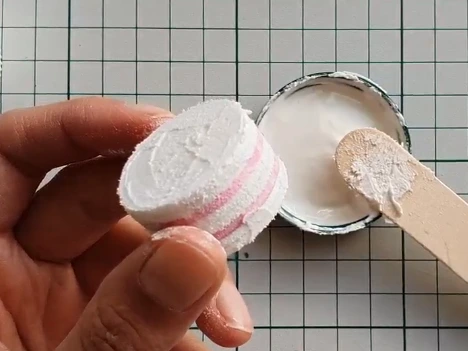
This layer doesn’t have to be perfect; it just gives your final frosting something to grip and helps smooth out any gaps between the foam layers.
Step 3: Make the Handmade Frosting Tool for Tiny Doll Cake
To frost a miniature doll cake, you need a tiny piping tool that creates small, detailed ridges – something regular piping tools can’t do. Here’s how to make one using a simple tealight candle holder and a plastic piping bag.
1. Prepare the metal tip:
Cut a 3 cm long strip from the side of an empty aluminum tealight candle cup.
Draw a small curved edge on one side and cut out the shape with 5–6 tiny “teeth.”
These little teeth will give your frosting the delicate texture a miniature cake needs.
2. Shape it into a cone:
Wrap the metal piece around a pen or pencil to form a tiny cone-shaped piping tip, then secure the seam with a small piece of tape.
3. Prepare the piping bag:
Cut about 10 cm off the narrow end of a plastic piping or confectionery bag.
Then make a 1–1.5 cm opening at the very tip.
4. Assemble the miniature piping tool:
Gently push the metal cone through the opening in the piping bag.
It should fit snugly just like a real piping nozzle, but in miniature.
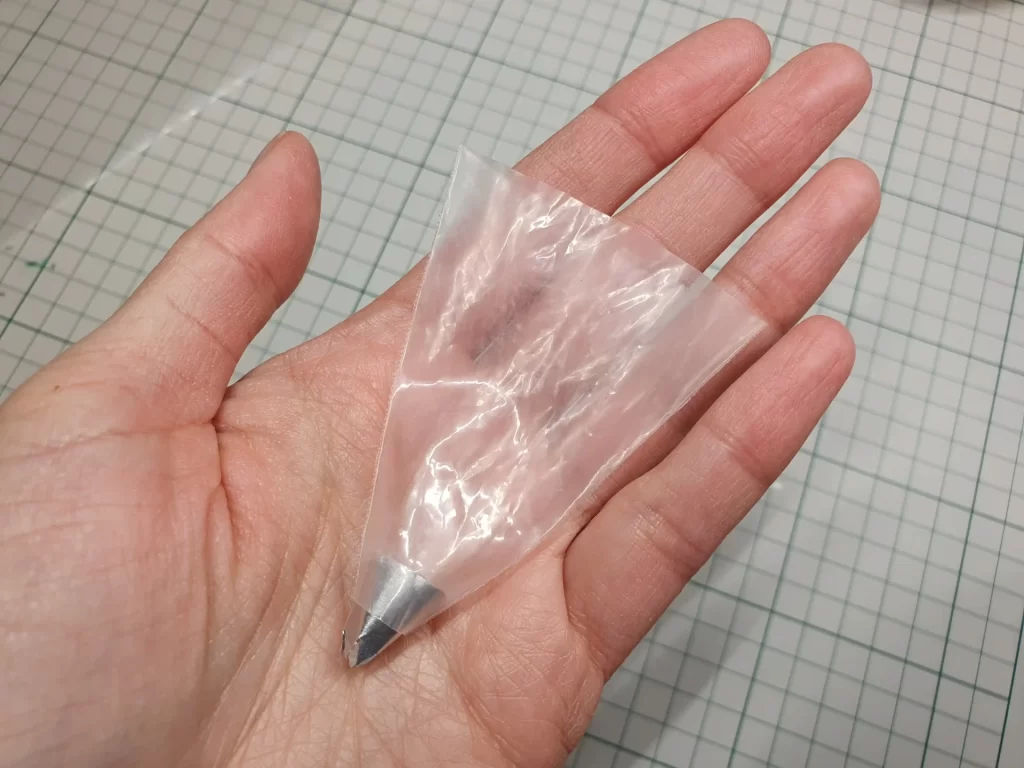
This simple tool makes the biggest difference in your final cake design and opens the door to so many miniature cake decorating techniques.
Step 4: Frost the Top of your Miniature Doll Cake
Once your frosting tool is ready, you can start decorating the cake.
Tip: First check the frosting consistency. The texture of the filler is very important for a smooth result: If it is too watery, the frosting will collapse and won’t hold its shape; If it is too thick, it may crack or be difficult to squeeze through the piping tip. You’re aiming for a consistency similar to thick toothpaste or buttercream.
Fill the piping bag with the same wall filler paste you used for the base layer. Before you frost the actual cake, try piping some lines or swirls onto a scrap surface to test the consistency. Adjust with a tiny bit of water (if it’s too thick) or let it sit for half an hour (if it’s too thin).
When you’re ready, frost the top of the cake: press the bag firmly and steadily and move in a circular motion or in the pattern you prefer, without lifting the tip too often.
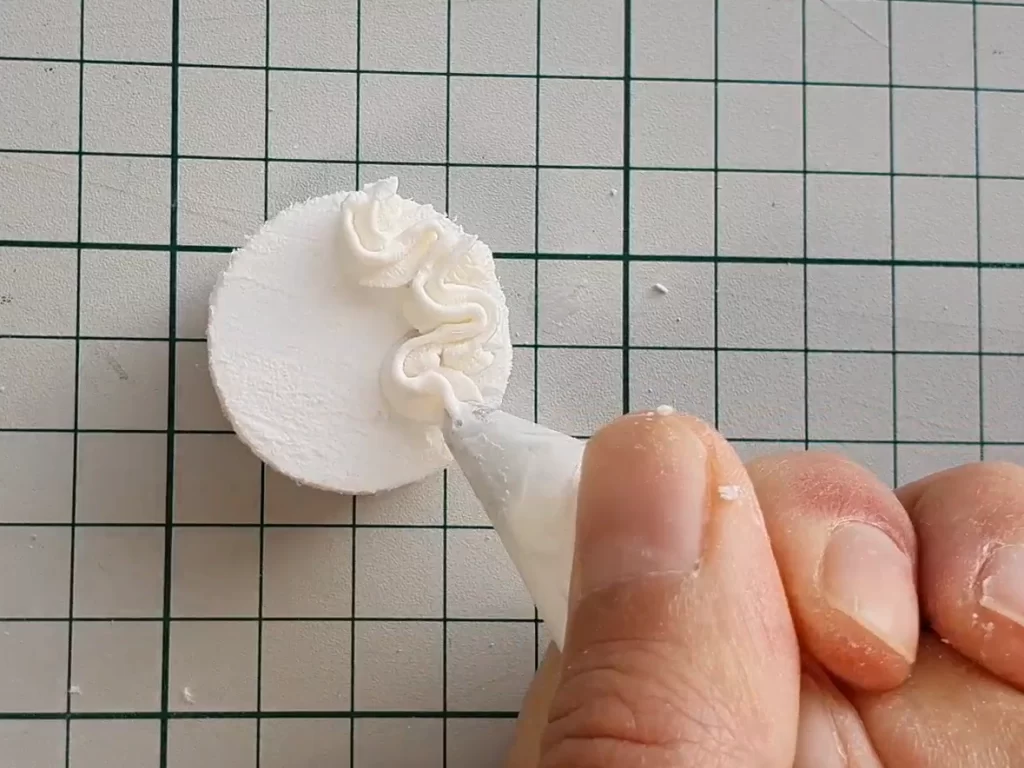
Try to work in one smooth motion where possible. Don’t worry if it isn’t perfect on the first try. One of the advantages of using filler paste is that you can still fix mistakes while it’s wet. If you really don’t like how it turned out, you can remove the frosting entirely and start over. I’ve had to do this a couple of times myself before I got the design I liked.
Step 5: Add Tiny Berries and Final Decorations
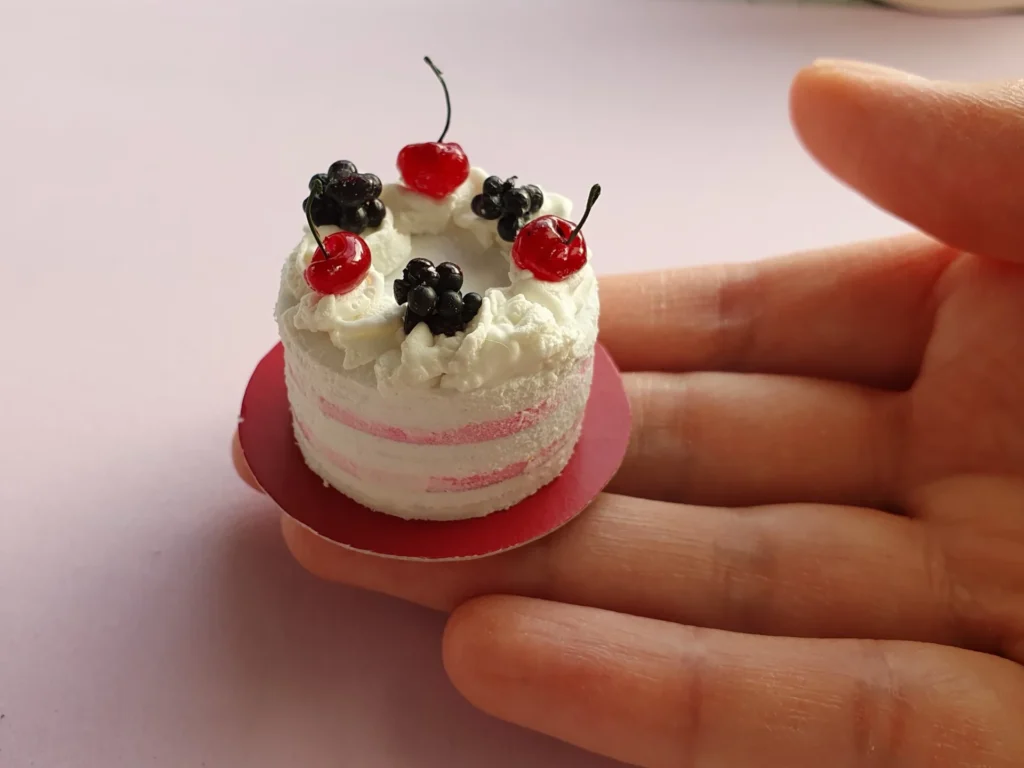
To finish the cake, I love adding tiny cherries and blackberries on top. They give the miniature cake a beautiful, colorful focal point and make it look like a real dessert.
The berries are made from hot glue and colored with nail polish to give them shine and depth. Here is the video, where I show exactly how to create these miniature cherries and blackberries.
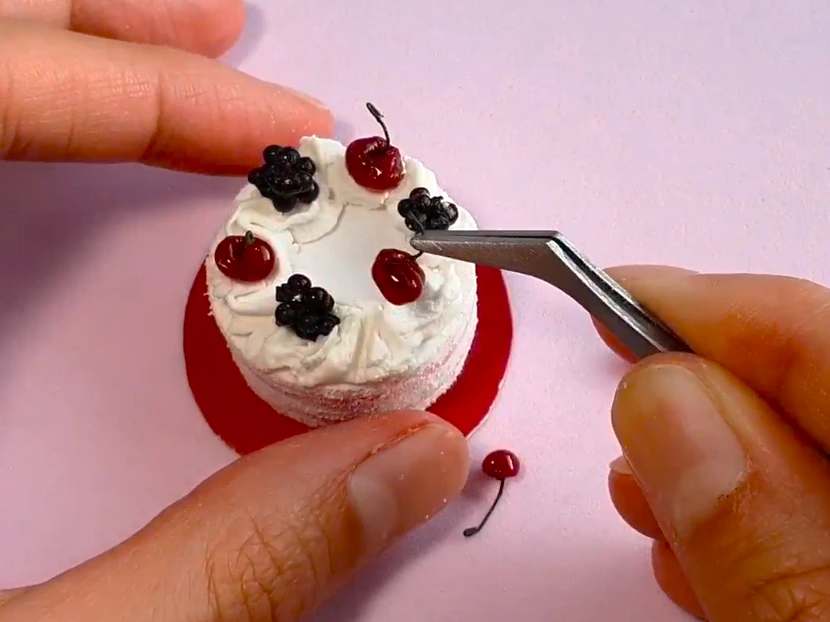
Once everything is dry, you’ll have a charming miniature doll cake with white “vanilla” frosting and realistic pink layers peeking through, decorated with glossy berries.
Frequently Asked Questions
My frosting collapses. What did I do wrong?
If the frosting loses its shape, it usually means the filler paste is too thin. Let it sit for a bit to thicken, or mix in a little more fresh filler until it holds its form better.
My frosting cracks when I pipe it.
Cracking is a sign that the paste is too thick. Add a tiny drop of water and mix thoroughly, then test it again on a scrap surface before returning to the cake.
The foam layers are sliding around while I frost.
Give the UHU glue more time to dry before adding the filler. Make sure each layer is firmly stuck in place before you start frosting.
The piping tip keeps clogging.
This can happen if the opening is too narrow or the filler is too thick. Try slightly widening the end of the tealight candle holder or adjusting the filler consistency.
More Doll Craft Tutorials from Taya Toy
If you enjoyed making this miniature doll cake, you might also like these other doll-sized projects:

Thank You for Crafting With Me
I hope this tutorial helps you make your own miniature doll cake with simple, accessible materials. It’s a lovely project for doll photography, dioramas, or just for the joy of making something tiny and beautiful.
If you try this idea, I’d be happy to see your results. You’re welcome to share your creations and tag Taya Toy so I can admire your miniature cakes.
And don’t forget to check back for my tutorial on how to make miniature cherries and blackberries from hot glue here!
Happy crafting,
Taya Toy